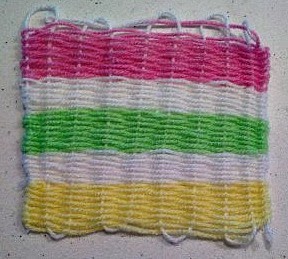
We have been learning about the pilgrims at school. I decided my students needed to try some old fashioned weaving. I found this terrific tutorial by Joel.
Then I Just cut up some squares of cardboard and introduced the idea to the kids. I was amazed at their reaction. They loved it! Even the boys! It kept them occupied over several class periods. I think it would be a fun project to try over the Thanksgiving break and it would keep the kids busy while Mom is in the kitchen. Here is a brief overview of the steps but I would really recommend checking out Joel's tutorial because he is much more thorough.
Cut the cardboard your desired size. We started small. Our cardboard was only 3x 4 inches. Cut notches on two opposite sides. You need an odd number of notches. We did ours 1 cm apart.
Start your yarn by sticking it through a notch and taping it to the back.
Then continue to pull work the yarn down one side and around the notch on the other side. Above is what your cardboard should look like on the back. Below is what it will look like from the front.
Then you can start weaving your contrasting yarn in and out across the cardboard. You can tape the end or use a plastic yarn needle. Some of my students liked using a needle and others didn't.
Here is an example of a project my daughter is working on. You can see how the weaving starts to come together. If you run out of yarn simply tie on another length. You can change colors at that point or keep using the same color.
Here is the weaving up close!
I don't have any pictures of removing the yarn from the cardboard loom but Joel explains it well. You simple bend in your cardboard tabs and the knitting slides off. You can then tighten up the ends and tie it off.
Here is another student's completed project. I think it would make a darling rug for a doll house or a great coaster for those mugs of hot cocoa. If you make them a little bit bigger, they also make great potholders.
Have fun!


No comments:
Post a Comment